
What’s in this guide (skip ahead)
I’ve been making roti at home for over a decade—first in a tiny London flat with a cheap non-stick pan, now in a kitchen with a proper tawa. And I’ll be honest: my first fifty rotis were terrible. Rock-hard, shaped like continents, tasting of raw flour. The problem wasn’t the recipe. It was the small stuff nobody tells you: water temperature, resting time, and how you roll the dough.
Let’s fix that. This guide is exactly how I make soft, pliable roti that puffs up on the flame and stays soft for hours—even after it cools. No fancy tools. No 20-ingredient list. Just flour, water, and a few hard-earned tricks.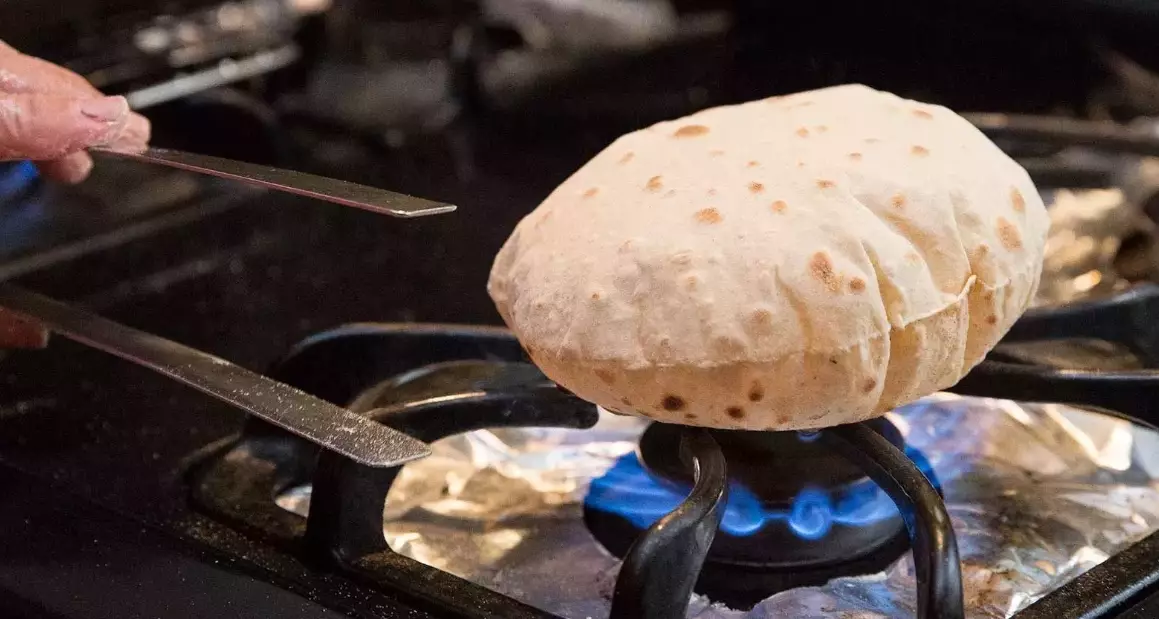
Ingredients That Actually Matter (And What You Can Ignore)
You’ll see recipes calling for oil, yogurt, milk, or even egg. I’ve tested them all. For everyday roti, you need three things. Everything else is optional—and often makes the dough harder to handle.
| Ingredient | Amount (for 8 rotis) | Why it matters |
|---|---|---|
| Whole wheat flour (atta) | 2 cups (240 g) | Use fresh, finely milled atta. Old flour absorbs less water and gives tough roti. |
| Warm water | ¾ cup + 1 tbsp (190 ml) | Warm, not hot. Hot water kills gluten structure; cold water makes dough stiff. |
| Salt | ½ tsp | Just enough to season. Skip it and the roti tastes flat. |
Optional: 1 teaspoon of oil in the dough. I add it when I’m making roti for a crowd because it keeps them softer a bit longer. But for everyday meals, I skip it. The real softness comes from resting and cooking technique.
Step-by-Step: How to Make Roti at Home (From Flour to Dough)
Here’s the exact sequence I follow. It takes 15 minutes of active work, plus 20 minutes of resting—and that rest is non-negotiable.
1. Mix the flour and salt
Whisk them together in a wide bowl. Make a well in the center.
2. Add water gradually
Pour half the warm water in. Mix with your fingers in circular motions. Keep adding water a splash at a time until the flour comes together into a shaggy mass. You’ll likely use all ¾ cup, but stop when the dough stops looking dry.
3. Knead for 5–7 minutes
Turn the dough onto a clean counter. Push with the heel of your hand, fold, rotate. Repeat. The dough should feel soft but not sticky. If it sticks, sprinkle a little flour. If it’s stiff, wet your hands and keep kneading.
4. Rest the dough (the step everyone skips)
Cover with a damp cloth or an inverted bowl. Leave it for at least 20 minutes. This rest hydrates the flour fully and relaxes the gluten. Skipping this is the #1 reason home-made roti turns out hard.
Rolling and Cooking (The Make-or-Break Part)
This is where most people go wrong. The dough looks fine, but the roti comes out leathery. Two things matter: how thin you roll, and how hot your pan is.
Rolling: Divide dough into 8 balls (about 50 g each). Flatten one ball between your palms. Dust with flour. Roll into a circle about 6 inches (15 cm) wide. Don’t roll it paper-thin—aim for the thickness of a coin (2–3 mm). Too thin and it dries out; too thick and it won’t puff.
Cooking on the tawa (griddle): Heat a cast-iron or non-stick tawa over medium-high heat for 3 minutes. It should be properly hot—a drop of water should sizzle and evaporate instantly. Place the roti on the dry tawa. Wait 30–40 seconds until you see small bubbles. Flip. Wait another 30 seconds. Now the important part: press the roti gently with a clean cloth or spatula. It should puff up. If it doesn’t, your heat is too low or the dough is too thick.
Direct flame finish (optional but recommended): If you have a gas stove, hold the half-cooked roti with tongs over a medium flame for 5–8 seconds per side. It will balloon beautifully. This gives that smoky taste you get at restaurants.
Troubleshooting: Why Your Roti Turns Hard (And How to Fix It)
I’ve made every mistake. Here are the fixes that actually work.
| Problem | Likely cause | Fix |
|---|---|---|
| Roti is stiff and brittle | Dough rested less than 15 minutes, or flour is old | Rest 20–30 minutes. Buy fresh atta (check the packed-on date). |
| Roti doesn’t puff | Tawa not hot enough, or rolled too thick | Preheat tawa for 3 minutes. Roll to 2–3 mm thickness. |
| Roti sticks to the pan | Dough too wet | Knead in 1 tablespoon of flour. Don’t oil the pan—dry cooking is key. |
| Roti tastes raw | Cooked on too low heat | Increase heat to medium-high. Cook until brown spots appear. |
One more thing: storing roti. If you’re not eating immediately, wrap them in a clean towel and put them in a hot-case or an insulated container. Don’t stack them on a plate—the steam makes them soggy. I use a small steel casserole with a lid.
Real Questions from My Kitchen (And DMs)
That’s it. No secret ingredients, no special equipment. Just flour, water, salt, and the patience to let the dough rest. Make it once, and you’ll never buy packet roti again.
This guide was fact-checked against standard Indian culinary references and my own kitchen notes from over 500 roti-making sessions.


Leave a Comment