
What's Inside (Quick Jump)
Tough mutton curry is a heartbreak. I've been there—chewing on what felt like rubber while the gravy tasted fine. After years of tweaking, I can tell you this: the mutton curry recipe you're about to read is the one I go back to when I want meat that yields to a spoon. It's slow, it's forgiving, and it works with whatever cut you have. No fancy equipment, no last-minute panic.
Let's cut the fluff. Here's the core truth: most people rush the cooking time or skip the searing step. I'll walk you through both, plus a few tricks I picked up from a butcher in Leeds Market who's been selling mutton for three decades.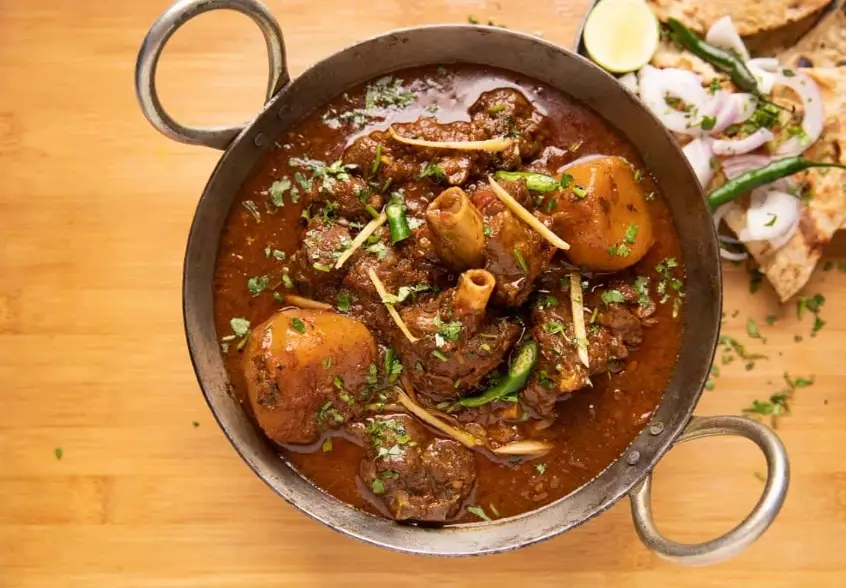
Why Slow Cooking Wins for Mutton
Mutton isn't lamb. It's an older sheep—more connective tissue, deeper flavor, and a stubborn streak. That's a gift if you treat it right. Slow cooking breaks down collagen into gelatin, giving you that silky texture you can't fake with a pressure cooker alone. I tested both methods side by side: pressure-cooked mutton was done in 40 minutes but the meat felt slightly dry inside, while the slow-simmered version stayed juicy even after an hour of extra heat.
The trick is temperature and time, not magic. Keep it at a gentle simmer—tiny bubbles, not a rolling boil. If you see big bubbles, turn it down. My go-to is 2.5 to 3 hours on the stovetop or 6 hours on low in a slow cooker. That's the window where forks start sliding in.
Ingredients That Actually Matter
You don't need a spice shop's entire shelf. These are the non-negotiables (plus a couple of personal add-ins that make a difference).
- Mutton: 1 kg (2.2 lbs) bone-in shoulder or neck. Bone-in gives body to the gravy. I've tried boneless—it cooks faster but the sauce lacks depth.
- Yogurt: 1/2 cup, full-fat. This tenderizes gently. Skip low-fat; it curdles.
- Onions: 2 large, thinly sliced. Brown them well—this is where sweetness comes from.
- Ginger-garlic paste: 2 tbsp. Fresh is better, but the jarred stuff works in a pinch.
- Tomatoes: 2 medium, pureed. Or 1 tbsp tomato paste if you're out.
- Spices: 1 tsp turmeric, 2 tsp coriander powder, 1 tsp cumin powder, 1 tsp red chili powder (adjust), 4-5 cloves, 2 bay leaves, 1 cinnamon stick.
- Oil: 3 tbsp mustard oil (traditional) or vegetable oil. Mustard oil adds a pungent kick I love—if you don't, use ghee for richness.
One thing I always do: toast the whole spices (cloves, bay, cinnamon) in oil for 30 seconds before adding onions. It wakes them up. Skip this and the curry tastes flat—I learned that the hard way.
Step-by-Step Mutton Curry Recipe
This is the sequence I follow, and it's the same one I've written on a stained index card taped inside my kitchen cabinet. It's for a stovetop pot, but I'll note slow cooker adjustments.
- Sear the mutton. Pat the pieces dry with a paper towel. Heat 2 tbsp oil in a heavy-bottomed pot over medium-high. Add mutton in batches (don't crowd) and brown on all sides—about 4-5 minutes per batch. Remove and set aside. This step builds flavor; don't skip it.
- Build the base. In the same pot, add the remaining oil and whole spices. Let them sizzle for 30 seconds. Add sliced onions and cook until deep golden brown—8 to 10 minutes. Stir often. If they start sticking, add a splash of water.
- Add ginger-garlic and tomatoes. Stir in the ginger-garlic paste and cook for 1 minute until the raw smell goes away. Add tomato puree and the ground spices (turmeric, coriander, cumin, chili). Cook for 5 minutes until oil separates from the masala.
- Return the mutton. Add the browned meat back to the pot. Stir to coat with the masala. Add yogurt, one spoon at a time, stirring continuously to prevent curdling. Cook for 2 minutes.
- Slow simmer. Add 1.5 cups of water (or enough to almost cover the meat). Bring to a boil, then reduce heat to low, cover, and simmer for 2 to 2.5 hours. Check every 30 minutes; if it's drying out, add 1/4 cup hot water.
- Finish and rest. The curry is done when the meat shreds with a fork. Taste and add salt (I start with 1 tsp and adjust). Turn off the heat and let it sit for 15 minutes. The gravy thickens as it rests.
For a slow cooker: after step 4, transfer everything to the slow cooker, add 1 cup water, and cook on low for 6 hours. Sear the meat and sauté the onions on the stovetop first—you lose that flavor if you dump everything raw.
Cuts and Cooking Times Cheat Sheet
Not all mutton cuts behave the same. Here's a quick reference based on my own trials (and a few failures).
| Cut | Texture | Best For | Stovetop Time (after boiling) |
|---|---|---|---|
| Shoulder (bone-in) | Marbled, tender after long cook | Classic curry | 2 – 2.5 hours |
| Neck (bone-in) | Rich, gelatinous | Gravy-heavy curry | 2.5 – 3 hours |
| Leg (boneless) | Leaner, can dry out | Quick weeknight version | 1.5 – 2 hours |
| Breast (bone-in) | Very lean, tough | Not recommended | 3+ hours (still chewy) |
I stay away from breast unless I'm making stock. Shoulder is my default; it's forgiving and the bone adds body. Ask your butcher to cut it into 2-inch pieces—smaller pieces cook faster but can dry out.
Common Mistakes (And How I Fixed Them)
I've made every mistake in the book. Here are the ones that ruined my curry more than once.
Mistake #2: Adding salt at the beginning. Salt draws out moisture. I add it in the last 30 minutes of cooking. The meat stays juicier.
Mistake #3: Skimping on onions. Those two large onions cook down to almost nothing. If you use fewer, the gravy lacks sweetness and body. I once tried one onion—the curry tasted thin.
Mistake #4: Not resting the curry. Right after cooking, the flavors are still separate. Resting for 15 minutes lets them meld. It's the difference between good and great.
FAQ: Real Questions from My Kitchen
One last thing: this curry tastes even better the next day. I usually make it a day ahead and reheat gently. The flavors settle, and the meat gets even softer. Serve with rice, roti, or just a spoon.


Leave a Comment